Updated 6/24/25. If you follow me on Instagram, you already know how much I love outdoor adventures. Whether it’s camping, hiking, biking, bridge diving, or swimming, nothing brings me more peace and joy than getting out into Mother Nature. In the past five years, I participated in the Babes Ride Out motorcycle camping trip, trekked the El Camino Trail in Spain, and hiked the Grand Canyon. During all of these adventures, I learned a thing or two about perfecting my on-the-go skincare routine with limited resources. Keeping in mind that everyone’s skincare needs will vary, I thought I’d share my own on-the-go skincare routine. These tips and tricks can come in handy any time you find yourself needing to do skincare with limited resources, whether that’s during a road trip, a day at the beach, music festivals, or anything in between. Let’s dive in.
Camping Skincare Essentials
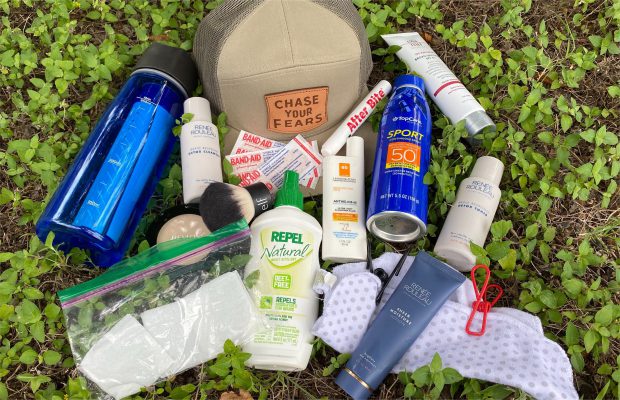
First thing’s first. These are the skincare essentials you’ll always find in my camping kit:
- My DIY eye makeup remover wipes
- Face cleanser (Rapid Response Detox Cleanser)
- Bottled water (if you won’t have access to clean water)
- Baby washcloth (for face washing)
- Clips (to hang the washcloth to dry)
- Degreasing toner (optional and best for those who are breakout-prone, Rapid Response Detox Toner is great)
- Night moisturizer (Skin Recovery Lotion is my summer-time moisturizer)
- Sunscreen (I like using one that has both chemical and physical protectors like Weightless Protection SPF 30)
- SPF mineral powder
- Water-resistant spray body sunscreen
- Hat
- Bandana
- Sunglasses
- Bug spray
- After Bite
- Band-Aids
The Best Skincare Routine for Camping
When you’re camping, I suggest a simple, abbreviated routine. There’s no need for eye creams, masks, serums, or active ingredients like exfoliating acids and retinol (which may make your skin more sensitive to sun anyways). In the daytime, your goal should 100 percent be about protecting your skin from harmful UV rays. In the evening, your goal should be to remove oil, sweat, dirt, and sunscreen from the skin as thoroughly as possible, while keeping it hydrated and balanced.
Nighttime Routine
Items you’ll need: eye makeup remover wipes (if you’ll be wearing mascara), cleanser, bottled water, baby washcloth, clips, degreasing toner and moisturizer
1. Use an Eye Makeup Remover Wipe
I don’t normally recommend skincare wipes, but when you’re on the go and need to keep it simple, they’re the most convenient option. If you’re wearing any kind of eye makeup, use these wipes to remove makeup as your first step. (On that note: I personally like to get my eyelashes tinted before going on an outdoor trip, so I don’t have to worry about mascara. To me, there’s nothing worse than waking up with crusty eyes from leftover mascara!) Be extra gentle on the delicate skin around the eyes. Instead of rubbing or pulling, close your eye and place the wipe on it for 15 to 30 seconds. This will melt the makeup. Then, all you need to do is sweep the wipe across your eye.
2. Apply Cleanser Using a Baby Washcloth
The reason I prefer baby washcloths over regular washcloths is that they’re softer and therefore gentler on the skin. They also tend to be thinner, which means you can hang them up to dry in the sunlight (many microbes are sensitive to UV light, and it can actually be used as a disinfectant).
Wet your baby washcloth (using bottled water if you don’t have access to a sink or clean water), apply a dollop of cleanser to the cloth, and gently massage it into your skin in small, circular motions. This wiping action is what will lift off leftover dirt, oil, and sunscreen. Once you’ve finished massaging the cleanser in, rinse your washcloth with water and wipe it gently over your face again to remove the cleanser.
3. Apply a Degreasing Toner
This step is optional, but it’s one I recommend if you have acne-prone skin. As I mentioned before, you’ll want to forgo actives like serums and retinol during a camping trip, so quickly swiping a toner over the skin is a good way to keep pores clear. My favorite product for this is Rapid Response Detox Toner.
If you don’t want to bring a whole bottle of toner, check out my tip for conveniently packing liquid skincare products.
4. Apply Moisturizer
For this, you can just use your regular nighttime moisturizer to keep the skin hydrated, healthy, and balanced.
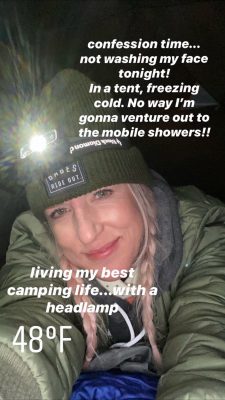 Confession Time: During my Babes Ride Out Motorcycle trip, we camped out overnight and it was SO cold that I couldn’t bear the thought of washing my face. I went to bed without doing a nighttime routine, opting to wash my face in the morning when it was warmer. When you’re out having an adventure, it’s okay to be a little lax with your routine for a couple of days! I say, shoot for cleansing your skin at least every twelve hours. If you don’t get to your routine at night, do it in the morning. The main goal is to have a relatively clean canvas when you apply your sunscreen. This will allow it to adhere to the skin better and be more effective.
Daytime Routine
Items you’ll need: sunscreen, mineral powder, water-resistant spray body sunscreen, hat, bandana, sunglasses
1. Wash Your Face
If you can, use a little cleanser to remove any residue from the night before. This will create a clean canvas, so your sunscreen can work as effectively as possible. That said, if you don’t have time or aren’t able to wash your face in the morning, I say don’t sweat it too much. After all, if there’s anytime to skip this step, it’s during a camping trip.
2. Layer Up With Sunscreen
I wear a moisturizer with SPF every day, but when I’m camping, I take a slightly different (and more involved) approach due to increased sun exposure. I like to layer a physical sunscreen over the top of my sunscreen moisturizer to give my skin full protection from the inside out. It’s important to note that doubling up on sunscreen does NOT give you double the SPF, it just means your sunscreen will hold up longer and that the coverage will be more comprehensive.
I will start with Weightless Protection SPF 30.
Next, I like to apply this physical sunscreen from Elta MD. It’s also water-resistant and since physical sunscreen filters sit on top of the skin rather than soaking in, I recommend everyone use a water-resistant sunscreen for this step. The physical filters most commonly used in sunscreen are titanium dioxide and zinc oxide. (You can read more about this layering technique for sweat-resistant sunscreen as well as the difference between physical and chemical sunscreen filters).
For my body, I also use a water-resistant sunscreen. I prefer it in spray form because it’s easier to re-apply throughout the day.
3. Touch Up Using a Mineral Powder
Even with all this layering, sunscreen will wear off eventually. When you’re out and about during the day, I recommend touching up on sun protection by dusting on a mineral powder. These almost always contain titanium dioxide, which means they’ll offer UV protection even if they aren’t indicated as a sunscreen product. I use this ColoreScience sunscreen powder.
4. Use Clothing as Sun Protection
Sunscreen should never be your only defense against the sun. When I go camping, I always bring a hat to shield my face from UV rays as well as a bandana to wear around the delicate skin on my neck (not shown in the picture above.) I also always recommend wearing sunglasses. Not only is this important for protecting your eyes, but squinting because of bright light can lead to premature wrinkling around the eye area. I sometimes even wear UV-protective clothing so I don’t have to worry about constantly reapplying sunscreen to my body and getting sticky. Learn more about why clothing should actually be your first line of defense when it comes to sun protection. If, despite your diligence, you do end up getting a sunburn, here’s what you can do to soothe it.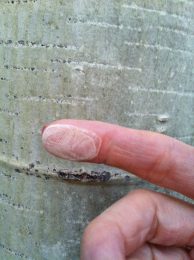
Fun Fact: Did you know aspen trees produce a substance that can be used as a “natural” sunscreen? Of course, I don’t ever recommend using this over actual sunscreen, but if you’re ever out in the woods and need additional sun protection, look for an aspen tree!
How to Prevent Scarring From Bug Bites
Items you’ll need: bug spray, After Bite, Band-Aids
Bug bites are a common problem when camping, and I consider them to be a skincare concern because of the post-inflammatory marks (discolored scars) they can leave behind. The goal, of course, is to get as few bug bites as possible, so make sure you protect yourself with bug spray.
If you do get a bug bite, apply something like After Bite, which uses sodium bicarbonate (baking soda) to soothe itching. I also suggest putting a Band-Aid over your bug bite at night, so you don’t scratch it while you sleep. A bug bite is already a form of skin injury, so if you scratch at it, you’re triggering even more pigmentation and discoloration.
Bottom Line
When you’re putting together a camping skincare routine, focus on the basics. Make sure you have all your sun-protection essentials for the daytime and do your best to remove everything at night. If you neglect your skincare routine a little during a camping trip, it’s not the end of the world. The main thing is to keep yourself protected from UV damage; the rest you can correct once you get home. Remember, clogged pores and breakouts can be corrected, whereas cellular damage from UV exposure cannot.
When you get home, the best way to reset and decongest your skin is by doing an exfoliating acid peel followed by a mask for your skin type. My go-to is the Triple Berry Peel/Rapid Response Duo. I always do this after a trip or when I’ve been on a plane to give my skin a fresh start.
I hope you found these tips helpful. Happy camping and happy summer!
Celebrity Esthetician & Skincare Expert
As an esthetician trained in cosmetic chemistry, Renée Rouleau has spent 35 years researching skin, educating her audience, and building an award-winning line of products. Her hands-on experience as an esthetician and trusted skin care expert has created a real-world solution — products that are formulated for nine different types of skin so your face will get exactly what it needs to look and feel its best. Trusted by celebrities, editors, bloggers, and skincare obsessives around the globe, her vast real-world knowledge and constant research are why Marie Claire calls her “the most passionate skin practitioner we know.”
")

