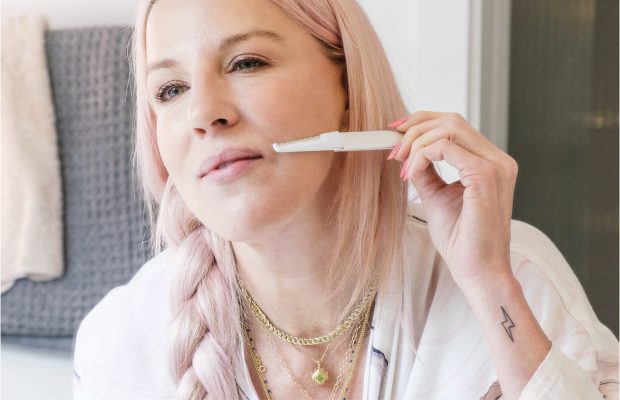
Updated 07/12/22. A few years ago, I started shaving my face every three weeks. The practice, which is called dermaplaning, has given me fantastic results—so much so, that I’m constantly recommending my clients try it too. Keep reading to find out why I’m such a big fan. Then, see my personal at-home dermaplaning routine and learn all of my best tips for doing it safely and effectively!
The Benefits of At-Home Dermaplaning
Dermaplaning is a form of physical exfoliation. It involves gently gliding a blade across the skin to remove the top layer of dry, dead cells. When it’s performed consistently and combined with chemical exfoliation, it can help reduce the appearance of dryness, dullness, hyperpigmentation, and post-breakout marks. It can also help skincare products that are applied directly afterward (ideally a serum formulated for your skin type) penetrate better.
Not only that, but it can remove vellus hair—commonly referred to as peach fuzz—which allows for seamless makeup application. This is especially helpful for women who are 40 and older (like me! I’m turning 53 this August). The slow decrease of estrogen in our bodies can cause an increase in facial hair, but at-home dermaplaning can keep that hair growth in check.
Many people are under the impression that this causes hair to grow back thicker, but this is definitely not the case. That said, the hair that grows back may feel slightly different than it did before, but that’s only because it has been cut straight across and has a blunt end. Rest assured it’s not actually thicker or coarser.
All of these benefits are similar to those you get from professional dermaplaning. During this treatment, a trained esthetician holds the skin taut and uses a 10-gauge scalpel held at a 45-degree angle to gently exfoliate the skin. It’s often combined with special masks and peels (usually a salicylic, lactic, or glycolic acid peel) to enhance exfoliation.
My At-Home Dermaplaning Routine
Before I get into my personal routine and share my best tips, I want to make a few important clarifications.
- I don’t use a razor. Instead, I use this dermaplaning tool, which was made specifically for this purpose.
- I avoid using any other exfoliating products (including scrubs and exfoliating acids serums) three days beforehand. As beneficial as at-home dermaplaning is, over-exfoliating the skin can damage the moisture barrier and lead to redness and irritation.
- There is a small risk of ingrown hairs, especially for those with darker or curlier hair.
- There’s also a small risk of nicking your skin if you aren’t careful. Be sure to use gentle pressure and move slowly to eliminate this risk. Try to keep your face as still as possible.
- For best results, only use a blade five times before tossing it. Depending on how much facial hair you have, you may use your at-home dermplaning tool anywhere from once per week to once per month. I use mine about every three weeks.
Now that those important details have been mentioned, let’s talk about my personal dermaplaning routine!
Step 1: Wash Your Face With a Gentle, Sulfate-Free Cleanser
Before ever touching your dermaplaning tool, you’ll want to wash your face thoroughly with a gentle, sulfate-free cleanser. Pat your skin with a towel and wait a few minutes to make sure it’s totally dry. I like using the Purifying Face Wash since it’s formulated to deep clean oily and/or sensitive skin without causing irritation.
Step 2: Hold the Blade at a 45-Degree Angle and Use Short, Upward Strokes
Move in the opposite way your hair grows and avoid areas where there are inflamed, pustular breakouts. If you don’t, you could cut an opening in a blemish and cause even more irritation. Trust me on this—it’s best to leave breakouts alone.
Breakouts or no breakouts, you should avoid going over the same area multiple times. Try to keep it to one or two short swipes at most. This will help minimize potential irritation.
Step 3: Apply a Hydrating, Soothing Mask and Moisturizer
This is an important step for soothing the skin and keeping dryness at bay. I start with the Bio Calm Repair Masque. I leave it on for 15 minutes, rinse, and follow up with a moisturizer formulated for my skin type. (I’m a Skin Type 6. If you don’t know your skin type, I highly recommend taking the Skin Type Quiz to find out. At the end of it, you’ll get personalized product recommendations to take the guesswork out of building a skincare routine).
That’s it! It takes as little as 15 minutes and I all the benefits of physical exfoliation and hair removal. I don’t just leave it at that, though. I practice good tool maintenance and always wash my blade with soap and water or dip it in rubbing alcohol. This ensures it stays clean and it’s ready for the next time I want to use it.
While at-home dermaplaning may seem like an intimidating addition to your routine, it’s actually pretty easy and can help you in your quest for smooth, glowing skin. I’m always recommending this easy, at-home routine to keep the skin looking its best!
Next, learn the best chemical peel for you, according to your skin type.
Celebrity Esthetician & Skincare Expert
As an esthetician trained in cosmetic chemistry, Renée Rouleau has spent 35 years researching skin, educating her audience, and building an award-winning line of products. Her hands-on experience as an esthetician and trusted skin care expert has created a real-world solution — products that are formulated for nine different types of skin so your face will get exactly what it needs to look and feel its best. Trusted by celebrities, editors, bloggers, and skincare obsessives around the globe, her vast real-world knowledge and constant research are why Marie Claire calls her “the most passionate skin practitioner we know.”


Comments:
Thank You for explaining in detail various steps that needs to be followed to Shave My Face, I believe this guide would be useful to everyone looking to get a smooth shaving experience.
Posted By: Jane Miller |
Hi, I was wondering what your thoughts are about dry brushing the face. There’s a 58 year old woman on youtube that dry brushes her face, and offers a special facial dry brush on her website. She says it’s as good as retin a without any side effects. Her skin is gorgeous and very glowy, so she must be on to something.
Posted By: Anna C |
I can assure you that dry brushing is not as good as Retin-A. Dry brushing is a surface exfoliator and Retin-A is a collagen builder. They have two totally different responses on the skin. But as for dry brushing the face, I would never suggest doing this. Much too harsh, a facial scrub with round beads is much more effective.
Posted By: Renée Rouleau |